Page 9 of 9

Re: tutorials

Posted: 14 Nov 2007, 17:00
by Dragster
snoopdogg879 wrote:can some one post a tut on how to make clickable tabs for websites in photoshop
if they know how to do that
http://www.evogfx.com/showthread.php?t=10094 ?
http://www.loadboy.com/Psptuts/PspX/25/default.aspx ?
http://www.tutorialjungle.com/display.p ... navigation ?
.
.
.

Google is your friend...

Re: tutorials

Posted: 15 Nov 2007, 21:47
by Jopuma
Some people on another forum asked the question "How do you make a tutorial?" :|

So I made an answer.

Image

Re: tutorials

Posted: 17 Nov 2007, 21:02
by xHaZxMaTx
How to Make a Bloom Effect
Using Photoshop CS

Bloom has been used extensively in more recent games to give a more photo-realistic image. It gives the image a softer quality and usually accentuates highlights, which can give most photos a very high-quality look.

Bloom can be artificially recreated fairly easily in as little as 3 steps (but may require more work for better results).

Finding an Image
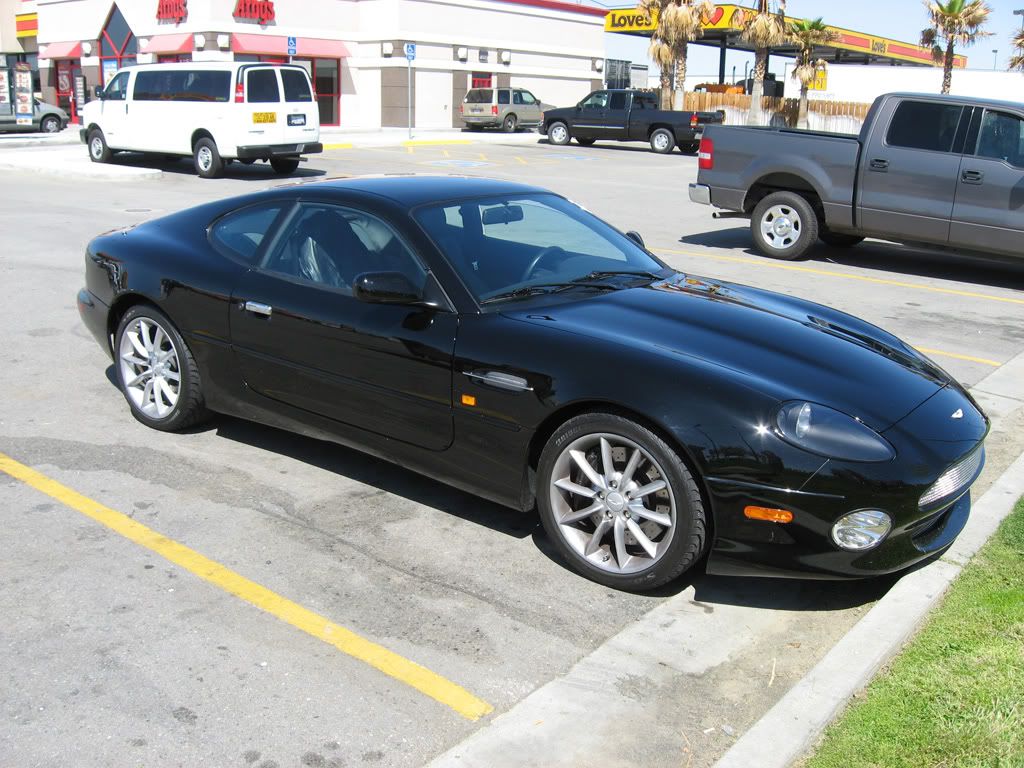
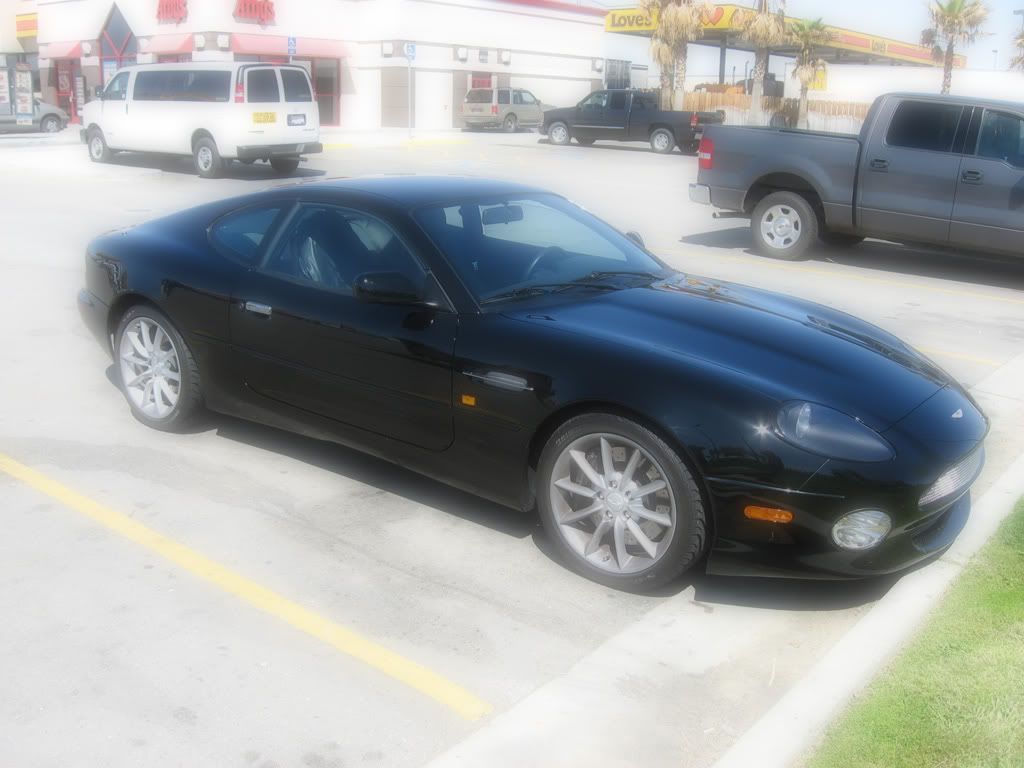
As I had previously said, this tutorial can give most images a professional quality, but - as the word 'most' implies - it does not work well with all images. You'll want to get yourself an image that is sharp (not blurry) and with little-to-no 'noise' or film grain. For this tutorial, I'm going to use an image I took, myself, of an Aston Martin DB7 Vantage.
Image


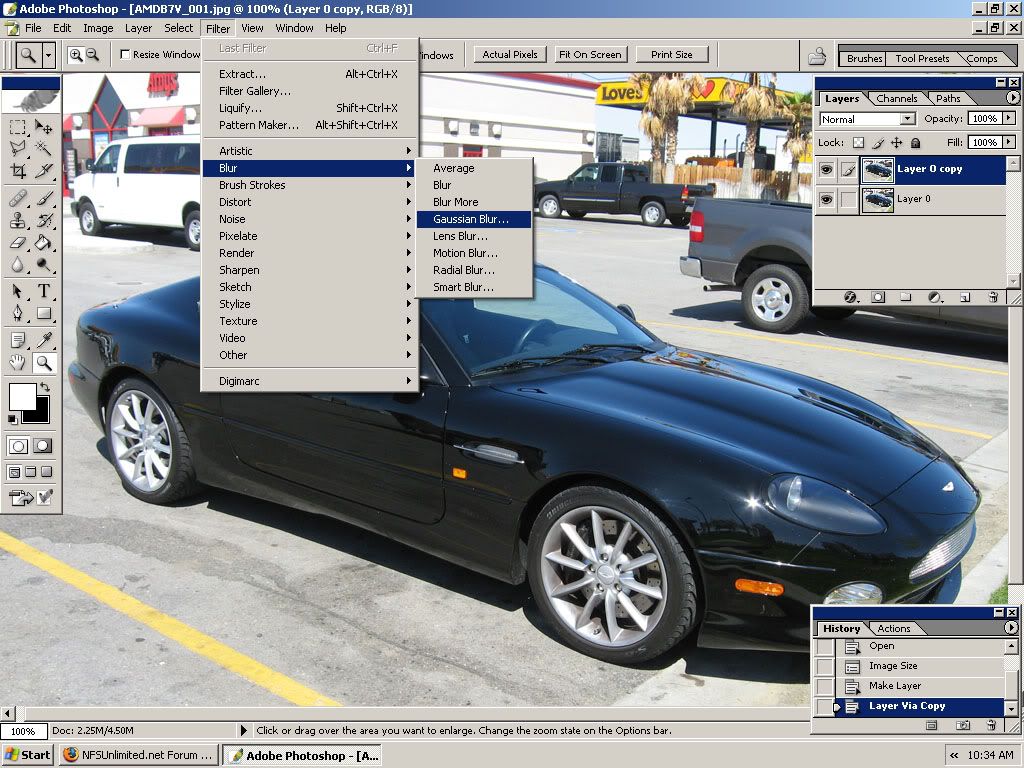
First thing you'll want to do is copy the image onto a new layer (Ctrl+J). With the new layer selected, go to 'Filter > Blur > Gausian Blur'. Generally, setting the blur radius to 10.0 pixels will do just fine, but it doesn't hurt to play around with it, seeing what you prefer.
Image

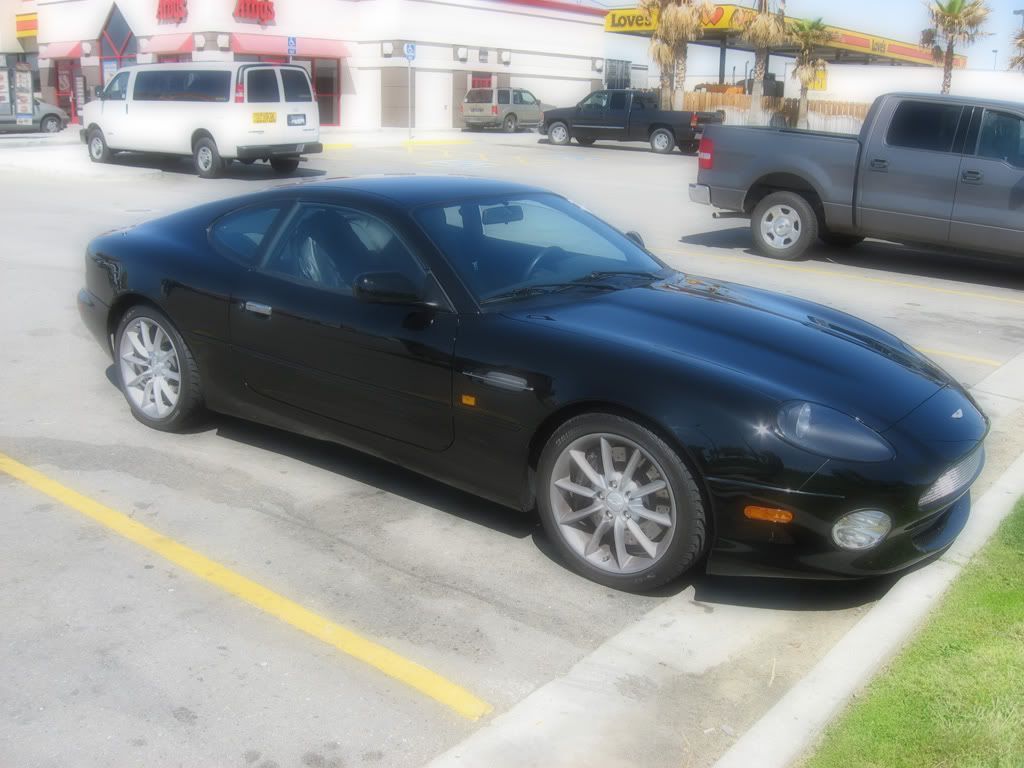
After blurring the top layer, your image will just look really blurry, and that won't do. You'll have to lower the opacity to get the desired effect. 50% usually works, but, again, mess around with it and see what you like. After having done so, the final result should look something like this.
Image


There is an extra step that can be used to give your picture that shiney/glowey look, but that doesn't work too well with images that aren't taken in a studio with proper lighting. As you can see here, it just makes the image look brighter.

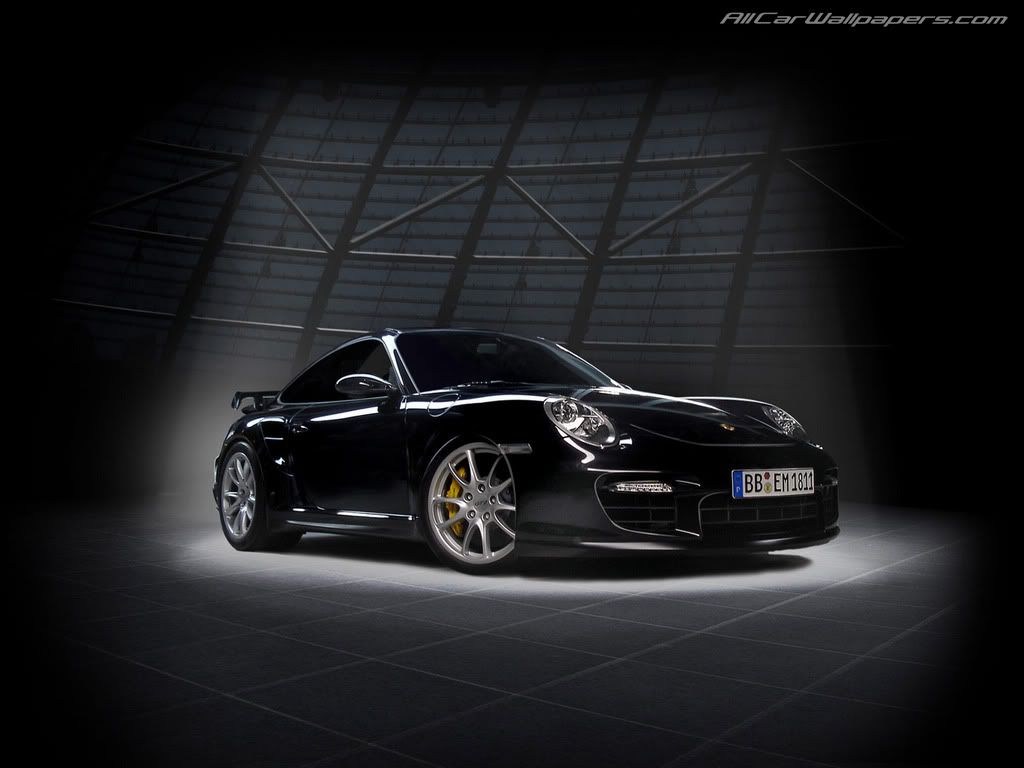
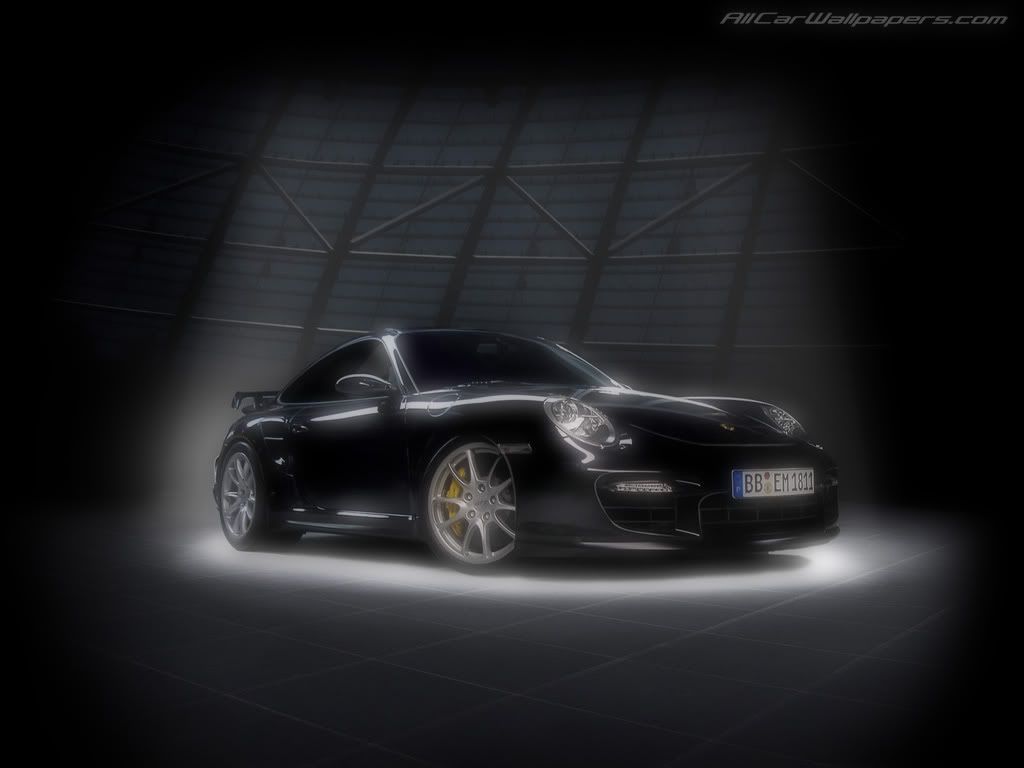
For the extra step, finding the right image can be much more difficult. Professional photo shoots are the way to go. For this extra step, I'll be using this photo of a Porsche 911 GT2, courtesy of AllCarWallpapers.com.
Image

This is a near perfect example of what to look for for this extra step; low ambient light, high contrast, defined reflections, etc.

You'll do everything to this photo that was done with the Aston Martin photo, after which, should look like this:
Image

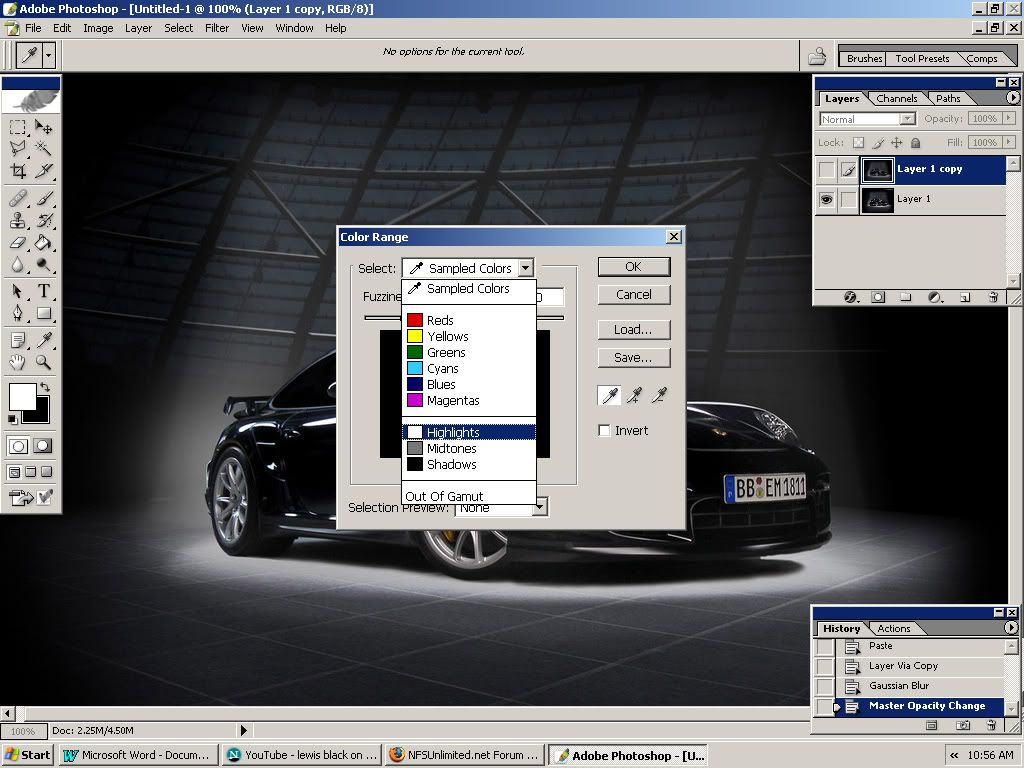
For the next step, hide the top (blurred) layer, and select the magic wand tool. Right-click on the image, select 'Color Range...', and select 'Highlights' from the drop-down menu in the window that comes up.
Image

With the highlights selected, go to 'Select > Feather...', and feather the selection. 10-25 pixels usually works well enough, depending on the selection (for this photo, I feathered the selection by 10 pixels). Create a new layer (Ctrl+Shift+N) above the other two layers, fill the selection with white, and lower the opacity. I usually set the opacity to 50%, but for this photo, I left the opacity at 100%. Unhide the blurred layer and you're done. The final result should look like this:
Image

Re: tutorials

Posted: 17 Nov 2007, 23:08
by Danyutz
thnx for this tut HaZ ... i find it wickid!

Re: tutorials

Posted: 18 Nov 2007, 01:27
by BrontoX
Nice tut.

Re: tutorials

Posted: 26 Nov 2007, 02:34
by snoopdogg879
Dragster wrote:
snoopdogg879 wrote:can some one post a tut on how to make clickable tabs for websites in photoshop
if they know how to do that
http://www.evogfx.com/showthread.php?t=10094 ?
http://www.loadboy.com/Psptuts/PspX/25/default.aspx ?
http://www.tutorialjungle.com/display.p ... navigation ?
.
.
.

Google is your friend...
thanks but i mean actually make them clickable
on second thought does anyone have a flash tut to make them clickable

Re: tutorials

Posted: 26 Nov 2007, 02:43
by xHaZxMaTx
What do you mean clickable? Like a link?

Code: Select all

<a href="http://www.demourl.com/"><img src="http://www.buttonurl.com/"></a>

Re: tutorials

Posted: 26 Nov 2007, 02:49
by snoopdogg879
like the tabs for nfsunlimited

Re: tutorials

Posted: 26 Nov 2007, 02:50
by xHaZxMaTx
You mean how they change when you mouse over them? That's got something to do with CSS style sheets, I think.

Re: tutorials

Posted: 26 Nov 2007, 02:51
by snoopdogg879
oh
does anyone know how to do what ^ he said ^

Re: tutorials

Posted: 26 Nov 2007, 11:55
by Danyutz
why don't you search on google "flash buttons" "animated buttons tutorials" or take http://www.tutorialoutpost.com or http://www.pixel2life.com

Re: tutorials

Posted: 26 Nov 2007, 17:52
by Jopuma
Another tutorial by me.

Image

Re: tutorials

Posted: 27 Nov 2007, 02:09
by snoopdogg879
danyutz wrote:why don't you search on google "flash buttons" "animated buttons tutorials" or take http://www.tutorialoutpost.com or http://www.pixel2life.com
the only reason i dont is becuase if i do search for something and i go into a website that has flash or any other stuff like videos it freezes up so thats why

Re: tutorials

Posted: 06 Dec 2007, 04:53
by Stereo
I have a bloom tutorial, no pics though.
THIS IS PHOTOSHOP
1. Get your pic.
2. Duplicate the background layer.
3. Go to Image>Adjustments>Threshold. (at the bottom)
4. Slide the bar left and right and make the white area where you want the bloom/glow effect to be.
5. Apply the threshold
6. Go to Filters>Blur>Gaussian Blur
7. Slide the bar around and look at the image. Once you get the nicest-looking blur, you can apply it. (The amount depends on the picture size/resolution)
8. Set the layer mode to lighten.
9. Slide the opacity bar around to choose the best-looking setting. I usually do 10%-15%.
10. You're done!

Re: tutorials

Posted: 10 Dec 2007, 08:40
by BAMF
Here is a very good! photoshop tip :D

Just by using the Dodge Tool (lighten) and the Burn Tool (darken) you can make ur NFS car look WAY more realistic. Also add Filter>Blur>Gaussian Blur to make the car have depth.

From this:

http://img99.imageshack.us/img99/4373/l ... pleyb1.jpg

To This:

http://img406.imageshack.us/img406/2220 ... opywb2.jpg


Have any questions, feel free to ask.

~Harmen

Re: tutorials

Posted: 10 Dec 2007, 09:36
by xHaZxMaTx
Nope, just makes it look blurry. :|

Re: tutorials

Posted: 12 Dec 2007, 10:29
by BAMF
well i used blur to much on that one but if u erase jus alil bit it helps

Re: tutorials

Posted: 12 Dec 2007, 17:12
by Dragster
Yeah that's a good tip, I used it on details, such as decals or logos on cars moving at high speeds. Gives a better effect than the usual blur methinks...

Re: tutorials

Posted: 28 Feb 2008, 05:13
by Jopuma
Newest tutorial. :)

High quality result in "Show Off Your Sigs".

Image

Re: tutorials

Posted: 29 Feb 2008, 00:50
by krazyammo
awesome tutorial...gonna attempt your tutorial this weekend :)

Re: tutorials

Posted: 29 Feb 2008, 02:33
by [S]izzLe
great tuts..new at the chopping scence any good tuts for beginners

Re: tutorials

Posted: 10 Apr 2008, 21:57
by korge
Great tutorials Jop. In reference to your art in general; your fonts suck and end up ruining your final graphic. :lol:

Re:

Posted: 19 May 2014, 09:53
by Jameshopes
Fantastic tutorial!I have been using Photoshop Elements for last two months and I'm taking help from LearnPhotoEditing.This website provides great photoshop tutorials and also much more designing tutorials.